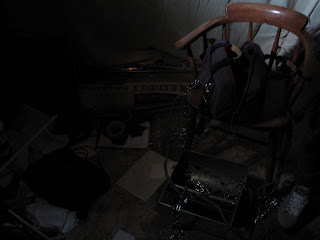


At high intensity.
Filming some initial test shots.


Using the orange filter gel on the lights to create a dangerous effect, in contrast to the blue.

Filming from the victims point of view.
Using the chain and padlock as props.

Close up of the chain and padlock.

Close up of a hand chained up.

Using the metal tray to chain the victims feet to.

The chair fully set up with chains, rope and metal tray (just missing the victim).

The weapon line up.

Close up of where the victims feet will be.

Low intensity lighting with blue filter gel (our final lighting setup).

Stairway for killers entrance.
A possible close up of the killers feet on stairway.

Point of view shot of killer walking into basement.

Killer looking through door where blue light shines through.

Our favourite shot of a victims hand on the door.

A hole in the door glass which could be exploited for shock.

What the killer sees as he enters.
The killers shadow as he walks.

Pitch black in hallway between the two light setups, disorientating the audience before the killer reaches the victim in the chair.
A gap in the shelves which the killer can look through and spy on the victim.

What the killer will see (with victim sitting in chair).
My Reflections
The test shoot went well, with my group getting a better feel of our location and deciding on where the lights would stand and where the characters will be positioned. We decided on the victim to be chained up in a chair in a corner of the basement furthest away from the door. Here there was not too much clutter compared to the rest of the basement, with the stacks of boxes and mops seeming easiest to move quickly compared to the various other items in other parts of the room. Also, there was a thin window slit here that we thought could be exploited in some way, and lots of useful props such as weapons, chains and rope. We placed a studio light facing on to the scene from the left, so this would be hidden behind a shelf aisle when the killer enters the scene. This was a decision we made after testing out various other positions, and seemed best suited to a particular POV track of the killers entrance/exit that we really liked. Before trying out shots we tested the camera at different intensities and different colours using blue, orange and green filter gel. We eventually decided to shoot with all the room lighting off, with the studio lights at a medium intensity, creating a low key effect casting lots of shadows and making some parts of the room completely dark, focusing the light on the important parts of the room. We went for the blue gel, as it gave off a cold, metallic look often associated with modern horror, connoting isolation and imprisoment whilst creating an eery atmosphere. With this lighting we managed to complete much more effective shots and gained some impressive footage, compared to earlier in the shoot when lighting was not so prominant. It was here we came up with the long POV track following the victim, and particuarly liked a point in the track passing the door, where a hand could appear blood smeared. The combination of dust on the glass door panes and blue lighting from behind the door created a very shocking effect. We thought this could be even scarier by flashing the lights on and off to create a flickering effect, and this led us on to a new idea with the lights flashing on and off whilst the killer progresses closer to the camera. We also got some good close up footage of the victim but decided on watching this, that a better actor was needed than ourselves. We liked the sounds created in the basement and tested out many of these such as banging and scraping a spade against the ground, stepping on glass and turning on the basement lights to create a buzz that we could play over and over again throughout the scene. This would create a long eery buzzing/flickering noise to go with the flashing lights, and we thought we could add the other sounds over the top randomly as well as some distance and some close male screams to create the situation of more than one person in the basement. We had 3 studio lights to light up the path the killer takes in the POV track, as well as the presence of one or two other victims and their sounds. As each light would have to be controlled to flash it, we decided at least one helper would be needed as well as 2 actors to play the part of the killer and victim. This would also help with the issue of space we found, as it took us a long time to clear out sufficient space for the cameras and pathway. With one or two people helping this job would be done quicker. We felt we would probably need a little more space than we cleared out on this test in order to retrieve LS footage of the victim. This is something we decided we may have to check with the caretakers, and ask if this space could be left so we would not have to clear out every time we shot in the basement. Other than this there were no real issues with the shoot, and with more organisation, props and helpers we decided the location could be near perfect for our film. The layout of it inspired our sequence and storyline and now we are content we can produce a really well filmed and lit opening to a modern horror/thriller film.


No comments:
Post a Comment